Setting up the Facebook Pixel (now Meta Pixel) ensures you can track, optimise, and measure the success of your Meta ad campaigns. When you create a Meta Ads campaign (including Facebook and Instagram), it’s crucial to ensure you have installed the Meta Pixel. The Meta Pixel is essential for:
- Tracking conversions to measure the actions users take on your website.
- Building retargeting audiences from website visitors who engage with your content.
- Using conversion data to automatically optimise your campaigns for better performance.
By implementing the pixel code to your campaigns, you’ll gain valuable insights to improve your campaign performance, make smarter optimisation decisions, and get the most out of your ad spend.
In this blog, we’ll guide you through how to set up the pixel and use it for conversion tracking.
Check out the video below with Mieke on how to set up your Meta Pixel in 2025:
How to set up & install the Facebook Pixel in 2025
Follow these steps to get started:
Step 1: Create Your Meta Pixel
- Log in to your Meta Business Suite (formerly Facebook Business Manager).
- Navigate to the Events Manager from the left-hand menu.
- Click Connect Data in the left-hand corner and select Web.
- Choose Meta Pixel, then click Connect.
- Enter a name for your Pixel (e.g., “My Website Pixel”) and input your website URL (optional).
Step 2: Add the Pixel to Your Website
- After creating the Pixel, you’ll be prompted to set it up. Choose one of the following methods:
- Option 1: Add Code Manually:
- Copy the Pixel code provided.
- Paste the code into the
<head>section of your website’s HTML. - Save your changes and publish the update.
- Option 2: Use a Partner Integration (e.g., Shopify, WordPress):
- Select your platform from the list of integrations.
- Follow the guided steps to connect your Pixel automatically.
- Option 3: Email Instructions to a Developer:
- Enter the email address of your developer, and Meta will send them the installation instructions.
- Option 4: For our clients we typically opt to install the pixel with Google Tag Manager
- Copy the pixel code provided
- Paste the code in a new html tag
- Name the tag Meta Pixel
- Create a Trigger to fire the Meta Pixel on ‘All Pages’.
- Save your changes and publish the container
- Or, simply send us the Meta Pixel script/code and we’ll do this for you.
- Option 1: Add Code Manually:
Step 4: Test Your Pixel
- Use the Test Events tab in Events Manager to confirm that your Pixel is capturing data from your website correctly.
- Perform a test action on your site (e.g., clicking a button or completing a form) and verify that the event is logged in the Test Events tab.
Step 5: Link Your Pixel to Your Meta Ad Account
- In the Business Settings, go to Data Sources > Pixels.
- Select your Pixel and assign it to your Ad Account.
- Grant necessary access permissions to your team members or advertisers.
Step 3: Set Up Conversion Tracking
- Go back to Meta’s Events Manager Tool and select your new pixel.
- Select Add Events and choose from the Pixel to track specific actions on your website (e.g., purchases, form submissions).
- Configure Event Tracking either manually (by placing custom event code – we typically don’t use this) or by using the Event Setup Tool, which allows you to add events without code (our preferred approach).
Step 6: Start Running Ads with Your Pixel
- Create a new ad campaign in Ads Manager.
- Under the Ad Set level, choose a conversion event (e.g., purchase, lead) that your Pixel will track.
- Launch your campaign and use the data collected by the Pixel to optimize performance.
Frequently Asked Questions when setting up Pixel
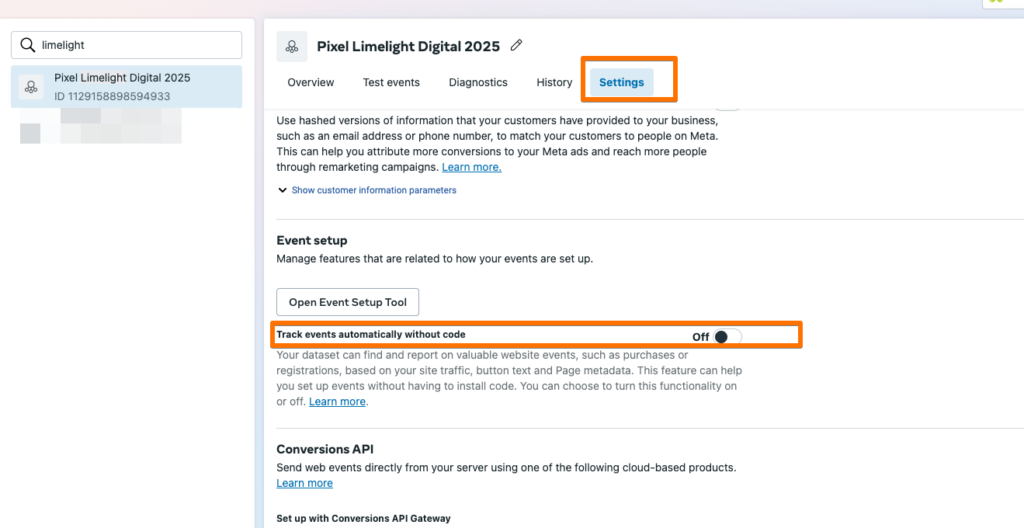
I see that we can set up Meta Pixel events automatically, do we select this option?
Yes, you can enable automatic event detection to see which events Meta automatically detects.
However, if you’ve already set up specific events manually using the Event Setup Tool, be mindful of potential duplicate tracking.
To ensure accuracy, use the Test Events Tool in Meta Events Manager to check whether events are firing correctly and to avoid duplicates.
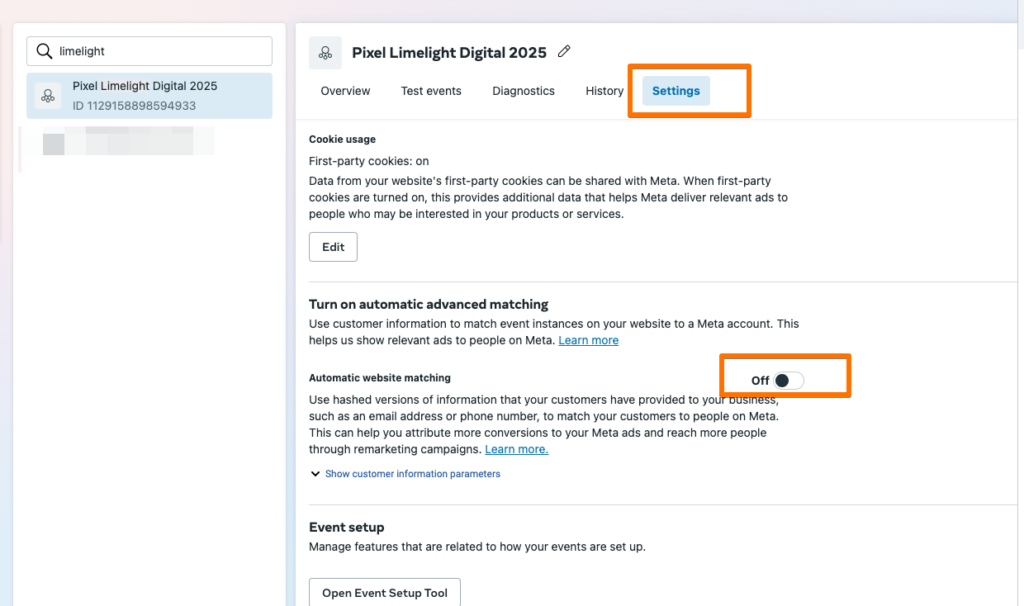
What is Meta Pixel’s Automatic Advanced Matching? Can I turn this on?
Automatic Advanced Matching is a Meta Pixel feature that allows your website to securely encrypt and share visitor contact data (such as email addresses or phone numbers) with Meta when users enter their details on your site. This helps Meta improve matching accuracy for remarketing and audience targeting.
To enable this feature, you must comply with Meta’s privacy policies and ensure your website visitors are informed that their data may be used for this purpose. If you meet these requirements and are comfortable with the implications, you can enable Automatic Advanced Matching within your Meta Pixel settings.
For more details, check out Meta’s information: Best practises for advanced matching for web.
What is Meta’s conversions API and do we set this up as well?
Meta’s Conversions API (CAPI) is Meta’s solution to the phasing out of third-party cookies on websites. Instead of relying on browser-based tracking (such as the Meta Pixel, which functions similarly to cookies), CAPI establishes a direct connection between your website’s server and Meta.
At Limelight, we take a cautious approach when it comes to setting up a direct connection between Meta and your website, as it reduces our control over what data is shared with Meta. Additionally, Google’s phasing-out of third-party cookies has slowed down, meaning there is currently less urgency to switch to CAPI.
Implementing the Conversions API requires developer involvement. If you’re considering this option, we recommend discussing it with your developer and referring to Meta’s Developer Documentation on Conversions API.
All done! But wait, There’s more…
Now that your Meta Pixel is installed and you are ready to track the performance of your Meta campaigns, you can link your pixel to your Meta ad account and add the pixel to your ads. If you’re feeling super data focused, why not take things one step further—just like we do at Limelight? By adding UTM parameters in your ads to the website URLs in your ads, you can track website clicks from Meta and Instagram campaigns in Google Analytics. This allows you to analyse the performance of your ads from both an engagement and conversion perspective, giving you even deeper insights into how your campaigns are performing.
Want to learn more? Keep an eye out for our next blog, where we’ll guide you through how to set up UTM parameters and make the most of your analytics!